Guide
DNS Setup — Vercel
Follow these steps to update your nameservers on Vercel so your domain points to Cloudflare.
1
Log in to Vercel
Go to vercel.com and sign in to your account.
2
Open Domain Settings
Go to your account or team settings → Domains → click the domain you want to update.
3
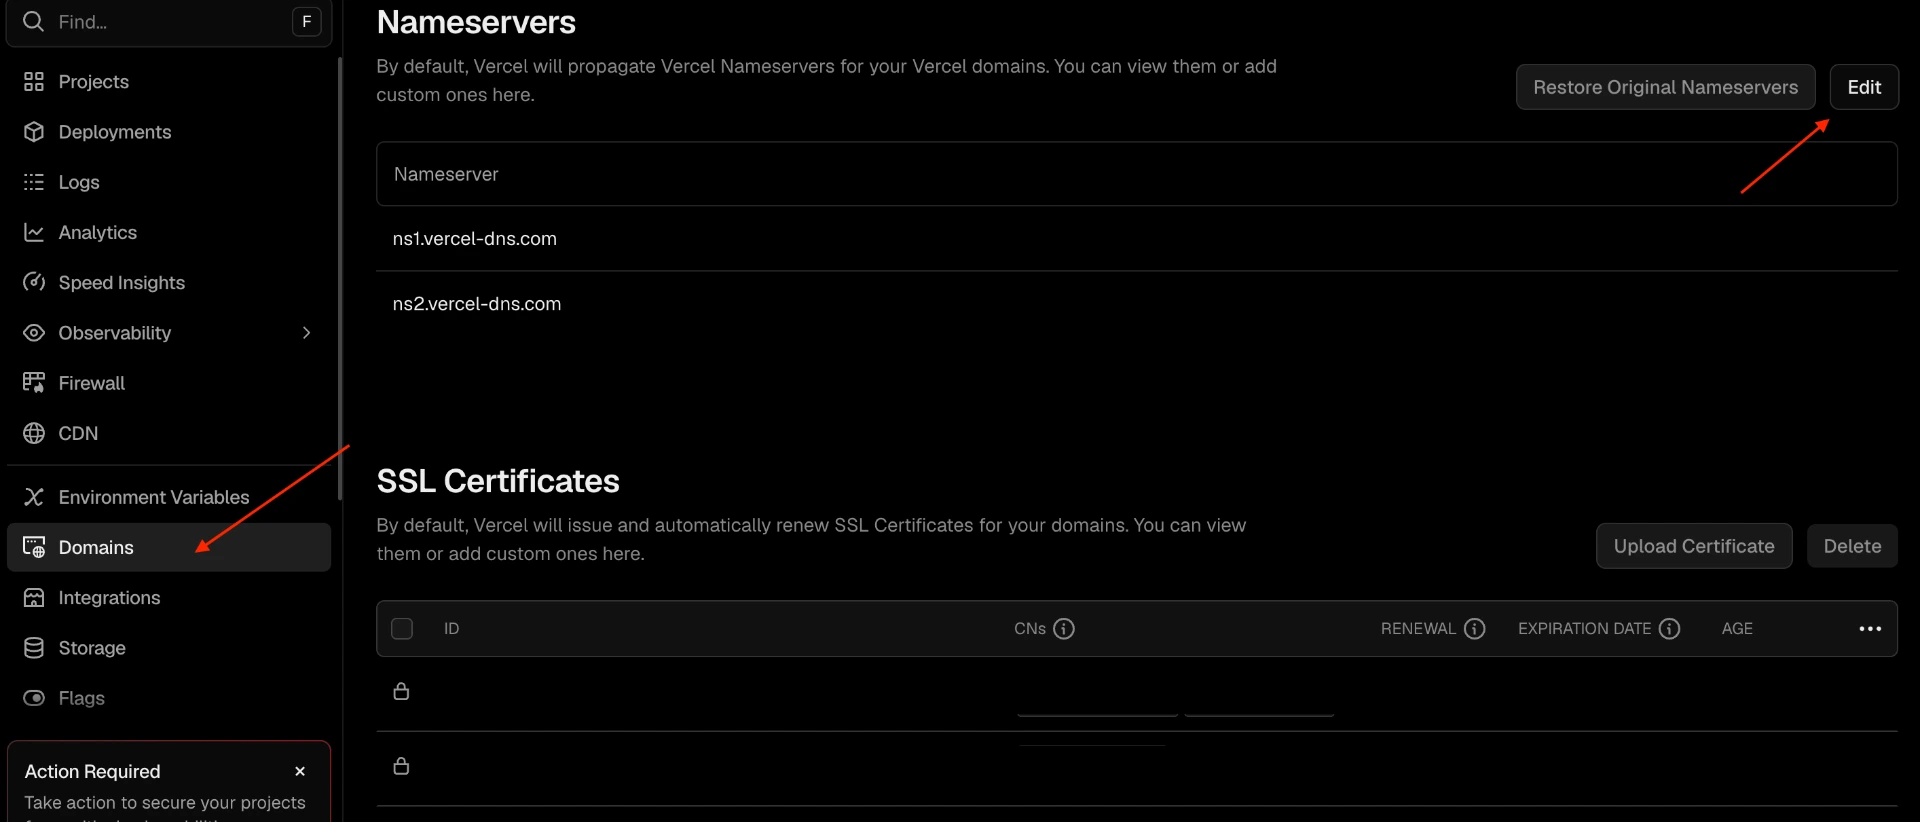
Find Nameservers
Scroll down to the Nameservers section. By default Vercel shows its own nameservers.
4
Switch to Custom Nameservers
Click Edit and select Custom nameservers. Remove the existing Vercel nameservers.
5
Enter your Cloudflare nameservers
In your Cloudflare dashboard, go to your domain → DNS → Nameservers. Copy the two nameservers Cloudflare assigned (e.g.
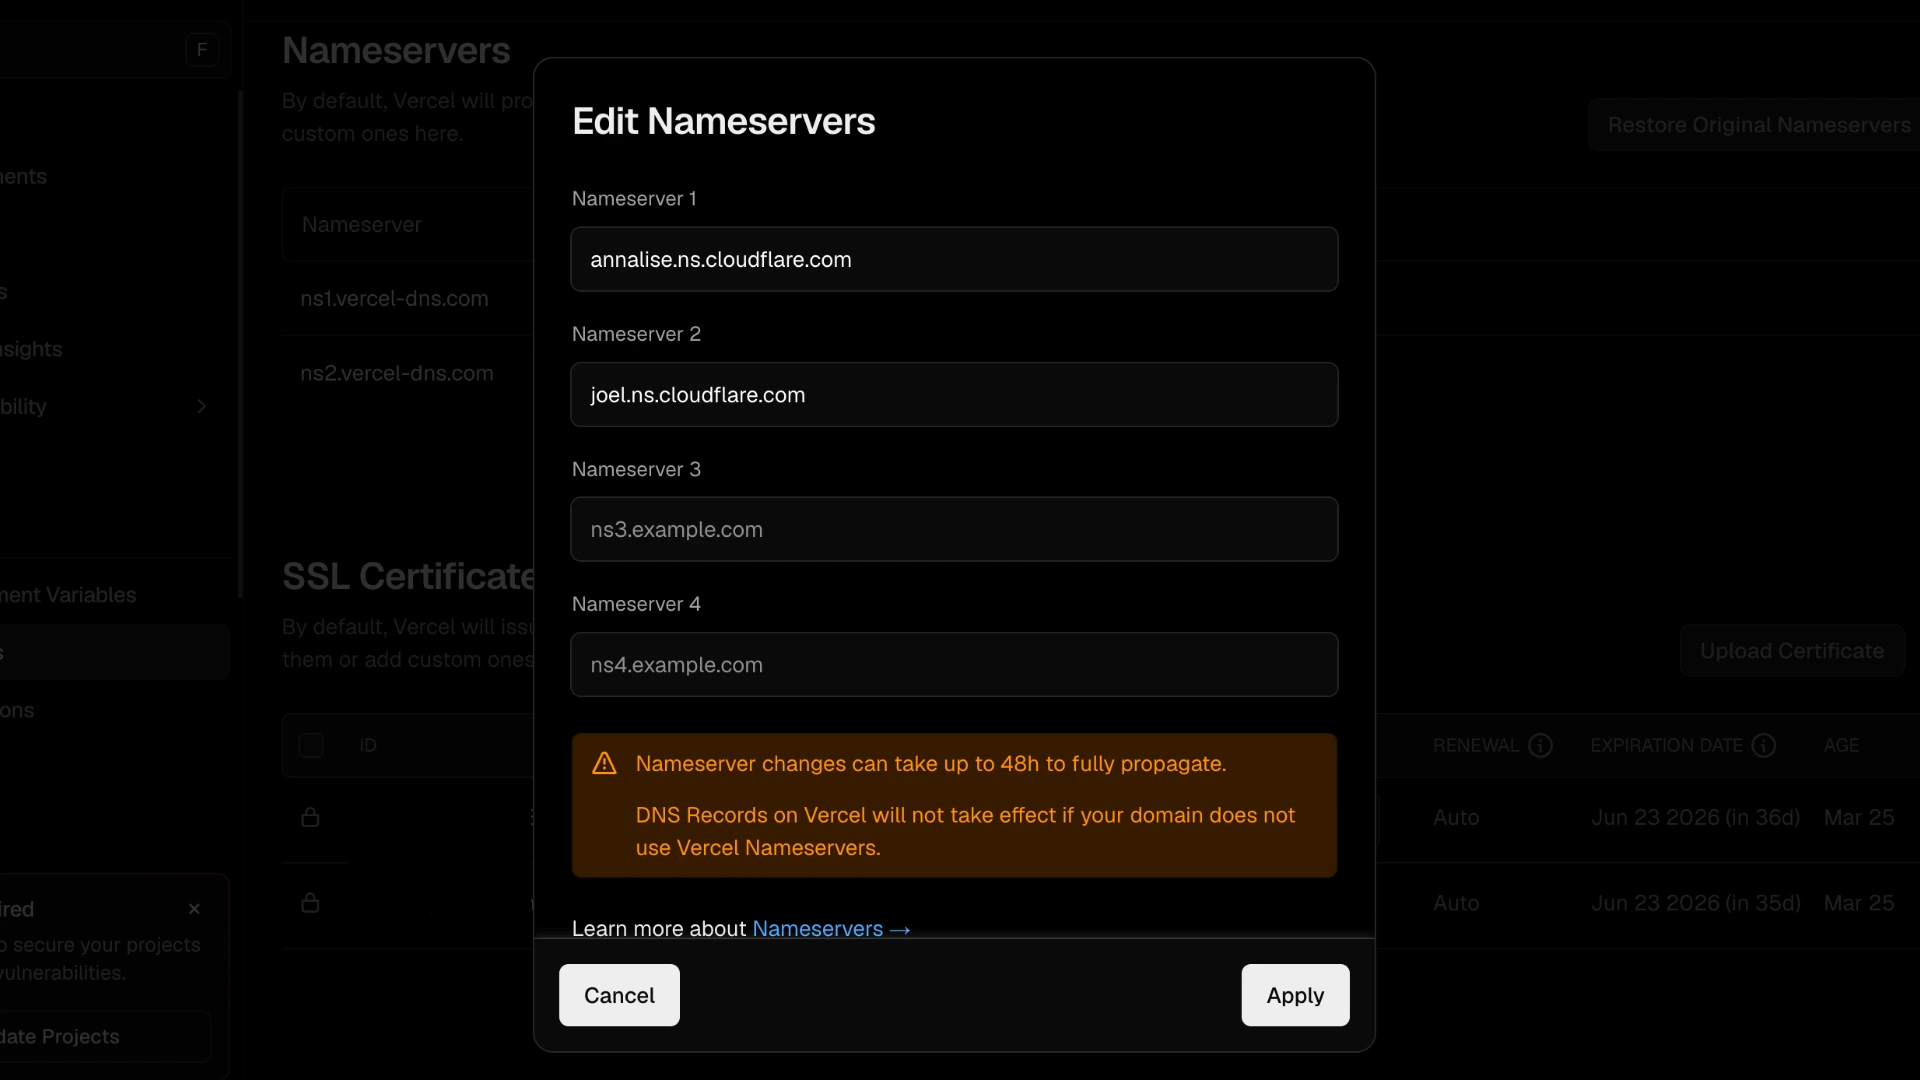
anna.ns.cloudflare.com and bob.ns.cloudflare.com) and paste them into Vercel.6
Save
Click Save. Vercel will warn that DNS management will move to Cloudflare — confirm and proceed. Changes propagate within a few minutes to 24 hours.
Once Cloudflare confirms the nameservers are active, your domain status on C22K will be updated to active.